Monday, April 15, 2024

Stripes and Dots Background

Hello crafters! I hope your weekend was good! Had both sun and rain and a fun visit with a new friend. 

Please note: this post has affiliate links, for which I receive a small percentage of sales generated by the link, at no extra cost to you.


This week we have a Make your own background theme at the Simon Says Stamp Monday Challenge Blog. Making my own backgrounds is one of my favorite things to do. Left-over backgrounds can also be used for many things, such as die cutting. 

Don't miss the beautiful project by our April guest Estelle Palumbo aka Atouscrap.

Layers of ink - Stripes and Dots Background Tutorial by Anna-Karin Evaldsson.

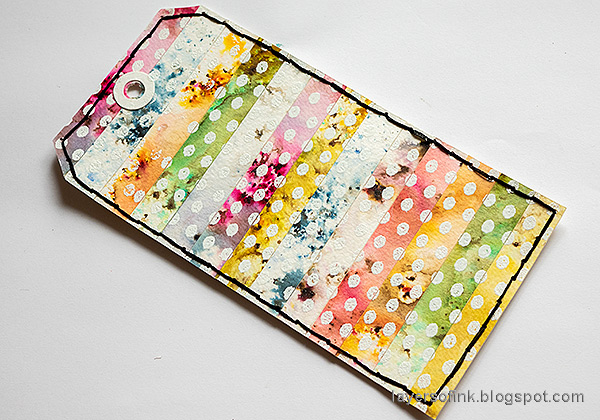
I made a background using a whole bunch of background papers that I made for another project, with Paper Artsys Infusions Colored Stains. The background was also stamped and stitched, to create a colorful and textured tag.

Layers of ink - Stripes and Dots Background Tutorial by Anna-Karin Evaldsson. Color paper with Infusions Colored Stains.

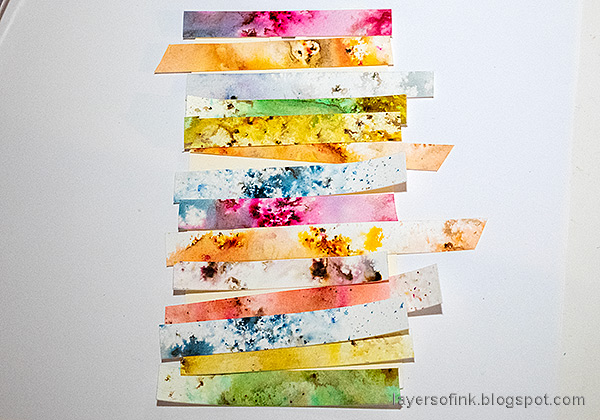
I started out with a lot of backgrounds which I made for another project. Sprinkle Paper Artsy Infusions Colored Stains on watercolor paper and mist with water to blend.

Layers of ink - Stripes and Dots Background Tutorial by Anna-Karin Evaldsson. Cut into strips.

I cut the papers into strips and arranged them on a tag.

Layers of ink - Stripes and Dots Background Tutorial by Anna-Karin Evaldsson. Adhere to tag.

Adhere with double-sided tape.

Layers of ink - Stripes and Dots Background Tutorial by Anna-Karin Evaldsson. Trim the edges.

Trim the edges of the tag.

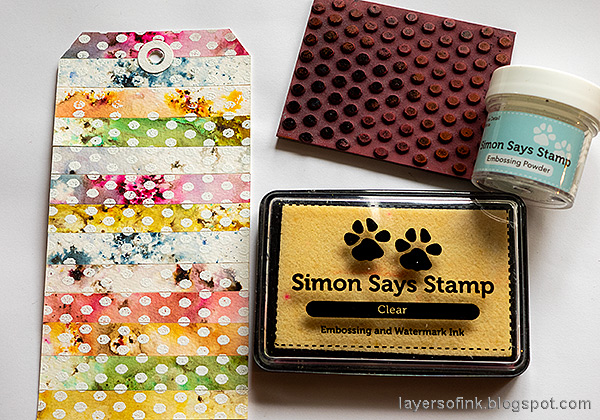
Layers of ink - Stripes and Dots Background Tutorial by Anna-Karin Evaldsson. Emboss Tim Holtz Tiny Textures.

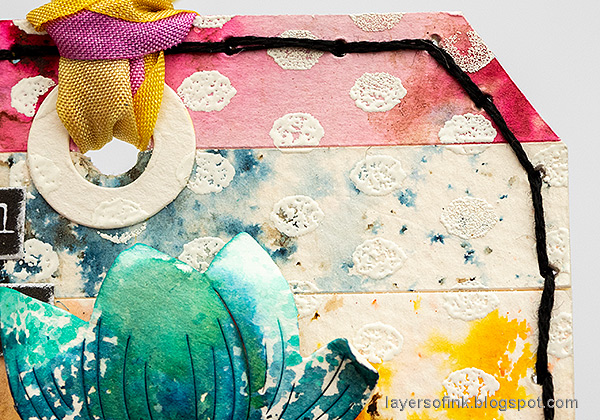
White emboss the tag with one of the stamps from Tim Holtz Tiny Textures set. This set is an old favorite of mine. Always take care when heat embossing so that you don't burn yourself.

Layers of ink - Stripes and Dots Background Tutorial by Anna-Karin Evaldsson. Stitch with DMC floss.

Pierce holes around the edge and stitch with three strands of black DMC embroidery floss.

Layers of ink - Stripes and Dots Background Tutorial by Anna-Karin Evaldsson. Dye the ribbon.

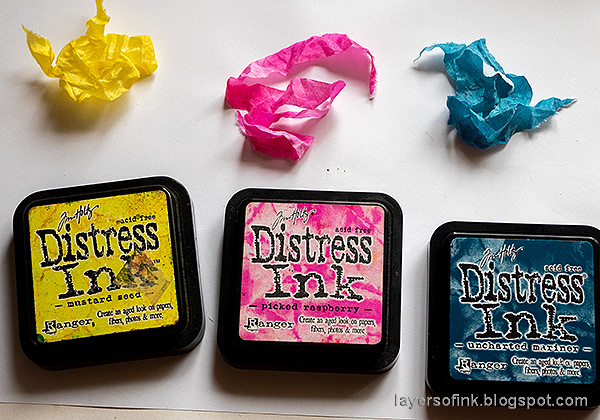
I dyed the May Arts Faux Silk Ribbon with Distress Inks so that it would coordinate with the tag.

Layers of ink - Stripes and Dots Background Tutorial by Anna-Karin Evaldsson. Die cut Simon Says Stamp Etched Flower Buds.

Die cut Simon Says Stamp Etched Flower Buds from watercolor paper.

Layers of ink - Stripes and Dots Background Tutorial by Anna-Karin Evaldsson. Color with Distress Ink.

Apply Distress Ink to a non-stick craft sheet, mist the water and press the flowers into the ink. Let dry and repeat until you are happy with the look.

Layers of ink - Stripes and Dots Background Tutorial by Anna-Karin Evaldsson.

Die cut the sentiment from other pieces of Infusions paper. I used Simon Says Stamp Fancy Hello.

Layers of ink - Stripes and Dots Background Tutorial by Anna-Karin Evaldsson.

The dots unify the background in a nice way.

Layers of ink - Stripes and Dots Background Tutorial by Anna-Karin Evaldsson. Use Small Talk stickers.

Additional sentiments come from Tim Holtz Small Talk stickers and were first sanded around the edges.

Layers of ink - Stripes and Dots Background Tutorial by Anna-Karin Evaldsson. Adhere with Simon Says Stamp Foam Tape.

Let some of the green ink flow into the blue ink.

Layers of ink - Stripes and Dots Background Tutorial by Anna-Karin Evaldsson.


Layers of ink - Stripes and Dots Background Tutorial by Anna-Karin Evaldsson. Die cut Simon Says Stamp Fancy Hello.

Die cut the title from black cardstock and off-set slightly. Add a shadow with a black pen. I die cut swirls from Simon Says Stamp vellum using Tim Holtz Adorned.

Layers of ink - Stripes and Dots Background Tutorial by Anna-Karin Evaldsson.

Dying ribbon is always fun!

Layers of ink - Stripes and Dots Background Tutorial by Anna-Karin Evaldsson.

I hope you enjoyed this tutorial and that it inspired you to make your own backgrounds. The Infusions Colored Stain papers were originally made for this tutorial: Infusions Colorful Backgrounds. I also used them for the birds on this Grunge Mixed Media project.

Join us this week in our Make Your Own Background challenge! You have a chance to win a $25 gift voucher to do some fun shopping at Simon Says Stamp. You have until Monday 8am Ohio time. 1pm UK time, 2 pm CET to join in.


Do you use Instagram? If so please add #sssmchallenge so we can see your entries there too.


Thank you so much for stopping by here today! 

Happy crafting!

Anna-Karin

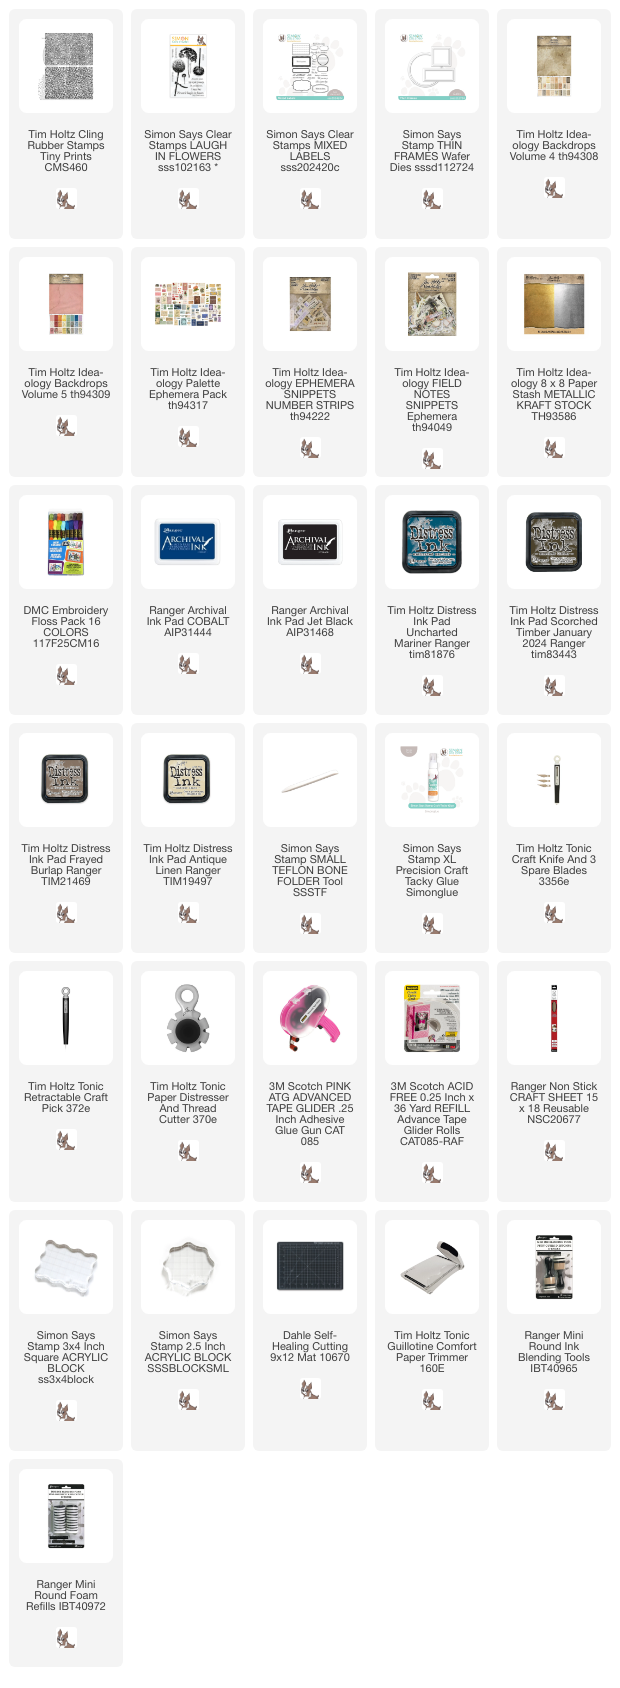
Supplies:

* Please note: the links are affiliate links, for which I receive a small percentage of sales generated by the link, at no extra cost to you.


Wednesday, April 10, 2024

Paper Mosaic with Dimensional Butterflies

Hi friends! I am happy to have a tutorial on the Simon Says Stamp Store Blog. I made a paper mosaic piece with dimensional butterflies. Here is a sneak peek: 

Layers of ink - Paper Mosaic Tutorial by Anna-Karin Evaldsson.

Paper mosaic is perfect for small pieces or scraps of papers. I used mainly ephemera by Tim Holtz. The butterflies are made from Wendy Vecchis Clearly For Art Modeling film, which keeps its shape perfectly.

To see the step-by-step tutorial and all the details, head over to the Simon Says Stamp Store Blog


Thank you so much for stopping by here today! 

Happy crafting!

Anna-Karin

Supplies:

* Please note: the links are affiliate links, for which I receive a small percentage of sales generated by the link, at no extra cost to you.


Monday, April 8, 2024

Vintage Floral Notebook

Hi stampers! It is a new week and I hope you had a good weekend. The Easter holiday is over here and gave a mix of sunny and freezing cold weather.

Please note: this post has affiliate links, for which I receive a small percentage of sales generated by the link, at no extra cost to you.


This week we have a Spring Flowers theme at the Simon Says Stamp Monday Challenge Blog. I love seeing how one spring flower after another appear at this time of the year, sometimes seemingly overnight. 

Don't miss the lovely project by our April guest Estelle Palumbo aka Atouscrap.

Layers of ink - Vintage Floral Notebook Tutorial by Anna-Karin Evaldsson.

I made a notebook/journal this week using a mix of idea-ology papers and ephemera and some stamping. The book is stitched along the spine and I used fairly thin notebook paper for the insert. You can of course use any paper that you want. In most of my handmade books, I used either sketch paper or watercolor paper. The book is about 4x5.8 in.

Layers of ink - Vintage Floral Notebook Tutorial by Anna-Karin Evaldsson. Stamp with Tim Holtz Tiny Prints

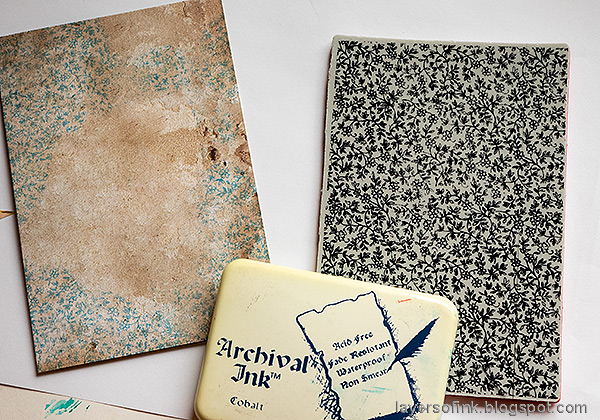
I used a piece of Tim Holtz Backdrops Vol. 4 paper for my cover and stamped it here and there with a Tim Holtz Tiny Prints floral stamp and Cobalt Archival Ink. That is one of my oldest ink pads, and it is still going strong.

Layers of ink - Vintage Floral Notebook Tutorial by Anna-Karin Evaldsson.

Pick out some ephemera, old book paper, and more Backdrops paper. Ink and distress the edges. I also used a piece of Tim Holtz fabric. Fray the edges of the fabric. Stamp sentiments on the cover and the focal image. The focal image comes from Tim's Palette Ephemera pack.

Layers of ink - Vintage Floral Notebook Tutorial by Anna-Karin Evaldsson. Pierce holes through the spine.

Fold papers for the insert and score with a bone folder. Make a template and pierce holes along the spine.

Layers of ink - Vintage Floral Notebook Tutorial by Anna-Karin Evaldsson. Stitch along the spine.

Stitch along the spine with a saddle stitch. I used three strands of DMC floss.

Layers of ink - Vintage Floral Notebook Tutorial by Anna-Karin Evaldsson.

Tie on the inside.

Layers of ink - Vintage Floral Notebook Tutorial by Anna-Karin Evaldsson.

I trimmed the notebook around the edges before gluing everything in place.

Layers of ink - Vintage Floral Notebook Tutorial by Anna-Karin Evaldsson. Add ephemera.

The gold circle was die cut with Simon Says Stamp Thin Frames. I found it on my desk and added it to the notebook.

Layers of ink - Vintage Floral Notebook Tutorial by Anna-Karin Evaldsson.

The floral card was inked with Antique Linen and Frayed Burlap. The top sentiment comes from Simon Says Stamp Laugh in Flowers. I stamped 'remember' and cut into a strip. It was used to cover up the message that was printed on the little notecard. 

Layers of ink - Vintage Floral Notebook Tutorial by Anna-Karin Evaldsson.

The main sentiment also comes from Laugh in Flowers. The butterflies are from Tim's Field Notes Snippets.

Layers of ink - Vintage Floral Notebook Tutorial by Anna-Karin Evaldsson.

The back cover was left with only the stamping. I also inked the edges around the notebook with Uncharted Mariner and Scorched Timber. I am very fond or how those two inks blend into a gorgeous shade of brownish grey.

Layers of ink - Vintage Floral Notebook Tutorial by Anna-Karin Evaldsson.

You can also stitch with a sewing machine, or use staples.

Layers of ink - Vintage Floral Notebook Tutorial by Anna-Karin Evaldsson.


I hope you will join us this week in our Spring Flowers challenge. You have a chance to win a $25 gift voucher to do some fun shopping at Simon Says Stamp. You have until Monday 8am Ohio time. 1pm UK time, 2 pm CET to join in.


Do you use Instagram? If so please add #sssmchallenge so we can see your entries there too.


Thank you so much for stopping by here today! 

Happy crafting!

Anna-Karin

Supplies:

* Please note: the links are affiliate links, for which I receive a small percentage of sales generated by the link, at no extra cost to you.


Monday, April 1, 2024

Rainy Days Card

Hello stampers! It is Monday and a new month. April is here.

Please note: this post has affiliate links, for which I receive a small percentage of sales generated by the link, at no extra cost to you.


This week we have a Whatever the Weather theme at the Simon Says Stamp Monday Challenge Blog. I hope you will join us! Since it is the first Monday of a new month, the team is showcasing products by a specific designer/company and this week it is Simon Says Stamp. You can find all the wonderful stamps, dies, stencils, inks, paper and accessories in the Simon Says Stamp Exclusive range here. 

We also have a new guest designer and this week it is Estelle Palumbo. Check out her blog Atouscrap to see what she has created for you this week.

Layers of ink - Rainy Days Card Tutorial by Anna-Karin Evaldsson.

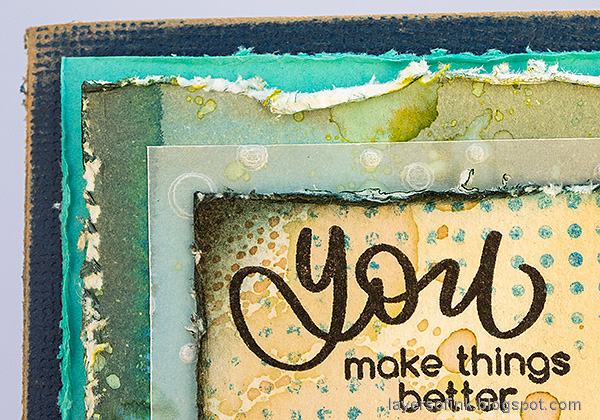
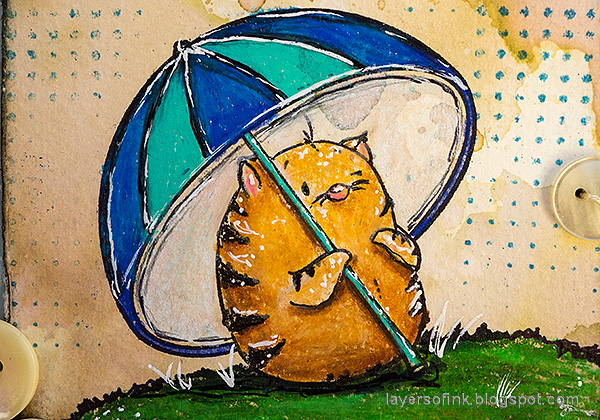
I made a little rainy days card this week. The cute stamp is by Simon Says Stamp and was colored with colored pencils. Rain was created both with a stamp and by dry embossing vellum. You only see a little of the vellum though since I didn't want to cover up all the inky paper under it.

Layers of ink - Rainy Days Card Tutorial by Anna-Karin Evaldsson. Stamp with Simon Says Stamp Happy Days.

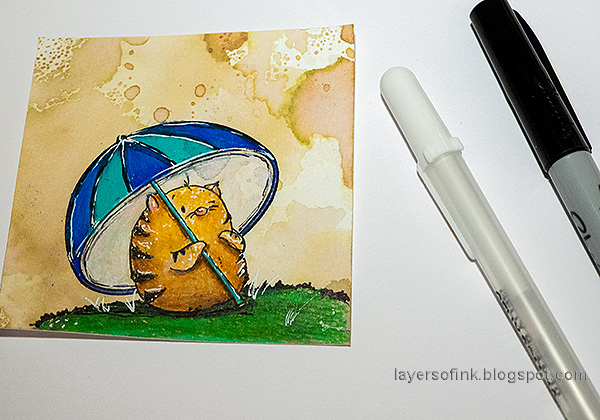
I had a a left-over piece of inky watercolor paper and stamped the image from Simon Says Stamp Happy Days with black ink. It was colored with Prismacolor pencils. 

Layers of ink - Rainy Days Card Tutorial by Anna-Karin Evaldsson.

Add details, highlights and grass with a black pen and a white gel pen.

Layers of ink - Rainy Days Card Tutorial by Anna-Karin Evaldsson. Stamp with Simon Says Stamp Halftone Background.


Layers of ink - Rainy Days Card Tutorial by Anna-Karin Evaldsson.

The vellum was embossed in the Simon Says Stamp Soft Snowfall folder. I used a left-over inky paper behind the vellum.

Layers of ink - Rainy Days Card Tutorial by Anna-Karin Evaldsson.

The sentiment from Simon Says Stamp Beautiful Butterflies was stamped with black ink.

Layers of ink - Rainy Days Card Tutorial by Anna-Karin Evaldsson.

I enjoy coloring with pencils on an inky or patterned background. 

Layers of ink - Rainy Days Card Tutorial by Anna-Karin Evaldsson.

Stitch a few vintage buttons to the card.

Layers of ink - Rainy Days Card Tutorial by Anna-Karin Evaldsson.

The second part of the sentiment also comes from Beautiful Butterflies.

I hope you will join us this week in our Whatever the weather challenge. You have a chance to win a $25 gift voucher to do some fun shopping at Simon Says Stamp. You have until Monday 8am Ohio time. 1pm UK time, 2 pm CET to join in.


Do you use Instagram? If so please add #sssmchallenge so we can see your entries there too.


Thank you so much for stopping by here today! 

Happy crafting!

Anna-Karin

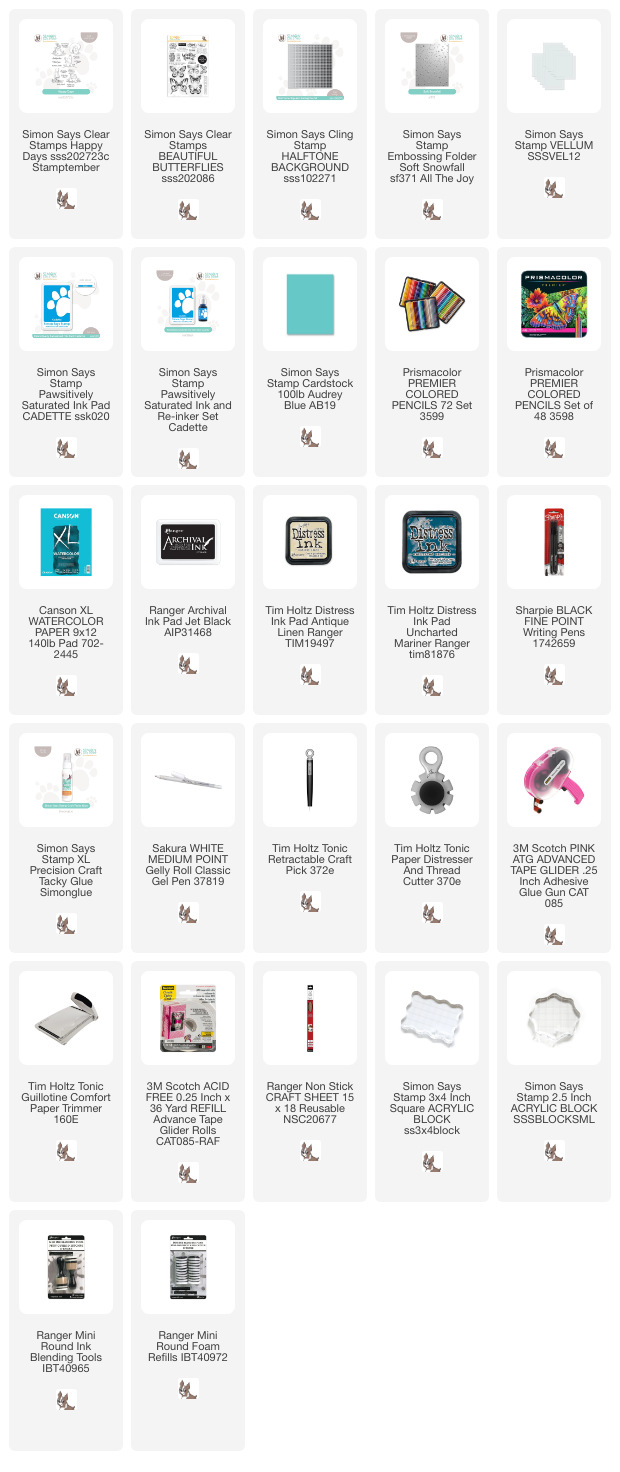
Supplies:

* Please note: the links are affiliate links, for which I receive a small percentage of sales generated by the link, at no extra cost to you.